Showing posts with label pattern modifications. Show all posts

Wednesday, December 30, 2015

And Last--But Not Least . . .

And for my final gift wrap up: part of this gift was completed early one, while the rest was a last minute add-on 'cuz I had enough yarn left over.
Almost finished hat

First off, the kitty-kat hat. I started this one early on in September (remember my complaints posted here? ). It took a little longer than the bulky and worsted hats because it was DK.  Then I waited to weave in all those ends (ugh, hate that necessary part of "finishing").
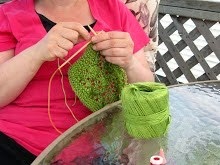
In-progress "pom-pom"

I also dragged my feet on making pom-poms 'cuz my experience with the process has not been positive.  However, I did find a couple of interesting links to modified pom-poms--or acceptable alternatives (check out this link from Repeat Crafter Me on how secure your traditional pom-pom).  I chose the alternative option which was a small crochet ball using this pattern (crocheted pom-pom, a free pattern on Ravelry.com).  Well actually, my first one was a HUGE ball that was much too heavy.  I re-worked the pattern to make it smaller.  These are my mods (somewhat following the pattern, except with different stitch counts):

Round 1: chain 4, slip stitch & then work only 4 sc.  
Round 2: 2 sc in each sc (8 st)
Round 3: sc in each sc (8 st)
Round 4: sc in first stitch and then 2 sc in next stitch (12 st)
Rounds 5-7: sc in each stitch
Round 8: sc in 1st stitch, then draw loop through 2 sc to decrease (8 st)
Round 9: sc in each sc
Round 10: stuff ball with filling & then decrease by drawing loop through 2 sc (4 st)
Cut long piece & then draw yarn through last 4 sc. Pull tight & secure.
Finished hat complete with faux pom-poms

What do you think of the finished hat?  The balls actually look like pom-poms 'cuz the yarn is so fuzzy.  Bonus: my niece loves it so much, she's been wearing it non-stop (she loves hats anyways, so this gift was a no-brainer).
My niece in her hat
I wasn't sure she would like the wrist-warmers, but she loved them too.  Sadly I have NO photos of these--not even in-progress shots. 
Poor substitute for finished photo of wrist-warmers
So I'll share a lovely photo of the yarn used.  I really liked the pattern, Cleckheaton Country Silk Fingerless Gloves (which is a free download at Ravelry.com).  It's an easy-to-follow pattern and the gloves fit well (I think it's the ribbing).  For the striping, I worked a plain knit row when adding a new colour.  No real mods, but I'd recommend changing thumb placement:  I wish I had knit the first 2 stitches BEFORE binding off the 6 stitches for the thumb opening. For the second mitt, I worked the round till the last 8 stitches, bound off 6 stitches and then continued in ribbing for last 2 stitches.

Now I can get back to knitting for l'il ol' me. ;)

Saturday, December 26, 2015

About All the Knitting . . .

There is much to share!

First off, all gifts were sent off and/or dropped off in time for the holidays.  That was a bit of a challenge.  You'd think a few hats would be easy to whip up, but I got distracted by work, school and family life in general--and of course I had to re-do one set of mittens and hat (remember this post ?).  And honestly, I wish I could have made more . . .  

Of course, when you knit for someone else, you never know if the recipient will appreciate the effort or even the item, especially if the recipient is a child.  It can be hit or miss (but I needn't have worried).
First Berry Hat with matching mittens
My sister and her kids loved their hats--and everything fit which is a double bonus, especially when the recipients are so far away.  Distance can make measuring next to impossible (although I suppose I could have asked my sister to measure the kids' heads, but that would have spoiled the surprise).
Second Berry Hat with matching mittens

Remember the  Pixie Earflap Hat with matching mittens?  As you may recall, the hat was the Iceland Earflap Hat  from Crystal Palace Yarns.  I made a few mods because the original was adult-sized and written for super-bulky yarn (I was working with bulky and needed toddler size).
Modifications included:
1) bulky yarn on 6.0 mm needles
2) brim worked in garter stitch instead of ribbing so it would blend into garter flaps
3) stitch count adjusted to accommodate toddler size:  when connecting flaps & joining in round, knit across 1st flap (15 st), cast on 9 st (instead of 12), knit across 2nd flap (15 st) and then cast on 15 stitches (instead of 18)--54 stitches total.
4) second hat had no I-cord ties, but was otherwise constructed in the same way

Last Minute Mittens
The mittens were an amalgam of two patterns:  mostly used Last Minute Mittens  from Valley Yarns, but used measurements from  Bernat's Family Mittens to help achieve appropriate size (and it helped to be working with toddlers who willingly tried on the mitts as I worked on them).

Modifications included:

1) used 5.0 mm needles instead of 6.5 mm
2) using women's size small, worked cuff in K2P1 for 1 1/2" (instead of 2").  Then worked 1 plain row in knit before working thumb gusset as written
3) after round 9 of thumb gusset,, worked 1 plain knit round before putting aside 6 thumb stitches on holder
4) worked body as written, but only until length was 5" (instead of 6-7").  Decreases worked as written
5) For thumb only worked 5 rows on 9 st (approx 1") before decreasing/casting off


I'm so pleased with the final results that I'd like to make more mittens.  Hard to find toddler-sized mittens that fit easily and stay on.  I tested these on toddlers in my classroom, so the pattern works.  I think I'll start by finishing the rust mitts I couldn't use for my niece.


More to come later  . . .

Sunday, July 21, 2013

Finishing . . . And other Stuff

Even though I was back to work, the past week was still good.  I finally had a chance to meet up with the gals at knit night--and that's always quite enjoyable. 
More Woolen Socks
And there was knitting, of course.  I actually finished a sock and immediately cast on for the second one--only a few more inches till I turn the heel.  Isn't the self-striping pattern cool?  I sooooo need more woolen socks 'cuz summer won't last forever (although hard to even contemplate winter at this point).
Sock Detail
By the way, I finished the modified dishcloth from PurlSoho.  Not quite sure it looks like the original Tweed Slip Stitch, but I still like the finished pattern.  I also love the thick fabric created by the slipped stitches.  I'd love to make more with different colours, but as usual, there are other projects needing my attention . . . .
Tweed Slip Stitch Dishcloth
By the way, here are my mods for the pattern.  I used Bernat Handicrafter Cotton which is worsted, so the original stitch counts had to be adjusted.  I cast on 35 stitches (33 for stitch pattern plus 1 stockingnette stitch at each end = 35 stitches total).  Then I worked a few rows of garter stitch before working pattern as follows:
Row 1: Purl
Row 2: K1, *Sl 1 (wyib), K2. Repeat from * till last stitch, K1
Row 3: P1, *Sl 1 (wyif), K2. Repeat from * till last stitch, P1
Row 4: K1, *K2, Sl 1 (wyib). Repeat from * till last stitch, K1
Row 5: P1, K1, *Sl 1 (wyif), K2. Repeat from * till last stitch, P1
Row 6: K1, K1, *Sl 1(wyib), K2.  Repeat from * till last stitch, K1
Row 7: P1, K2, *Sl 1 (wyif), K2.  Repeat from * till last stitch, P1
Work the same number of garter rows before binding off.  To finish off, I picked up stitches along the side (approximately 30 stitches) and worked same number of garter rows to create a border.

Saturday, January 21, 2012

About the Slipper Mods

Through the Woods
A few knitters have contacted me through Ravelry re: row-by-row instructions for the child version of the non-felted slippers.  So I decided to publish my changes here on the blog so I can re-direct other knitters here.  You will still need to print off the original pattern.


Child Version of Non-Felted Slippers
Here are my changes: Cast on 40 sts 
Row 1-K20 PM K20 
Row 2-Increase as per original pattern (44sts) 
Row 3 (and all odd rows)-Knit 
Row 4-Increase (48 sts) 
Row 6-Increase (52 sts) 
Row 8-Increase (56 sts) 
Row 10-Increase (60 sts) 

Row 11-Knit and remove markers

Instep: Row 1-Knit 
Row 2-P27 PM P6 PM P27 
Row 3-K20 ssk twice K3tog K6 sl 1 K2tog psso K2tog twice K20 (52 sts) 
Row 4-Purl 
Row 5-K16 ssk twice K3tog K6 sl 1 Ktog psso K2og twice K16 (44 sts) 
Row 6-Purl 
Row 7-K25 ssk (43 sts) 
Row 8-sl 1 P6 P2tog (42 sts) 
Row 9-sl 1 K6 ssk (41 sts) 
Row 10-sl 1 P6 P2tog (40 sts) 

Row 11-sl 1 K6 ssk (39 sts) 
Row 12-sl 1 P6 P2tog (38 sts) 
Row 13-sl 1 K6 ssk (37 sts) 
Row 14-sl 1 P6 P2tog (36 sts) 
Row 15-sl 1 K6 ssk (35 sts) 
Row 16-sl 1 P6 P2tog (34 sts) 
Row 17-sl 1 K6 ssk (33 sts) 
Row 18-sl 1 P6 P2tog (32 sts) 
Row 19-sl 1 K6 ssk DO NOT TURN K11 (31 sts) 
Row 20-P18 P2tog P11 (30 sts) 
Work cuff as written in original pattern.

Please remember this is NOT my pattern.  This great slipper pattern comes from Yuko Nakamura who has kindly provided her work for free here on Ravelry (it's a PDF file you can open and store on your computer or save in your Rav library).


Hope this helps out anyone who wants to make a child-sized version. I'll be back with a proper post soon.
Winter's Bounty

Saturday, September 24, 2011

Organic Design

So in "designing" my own version of Bountiful Bohus, I've had to rip out more than once.  Pictured below is my fourth cast-on (not too frustrating since each time I only got as far as just past the collar). In refining the increases and stitch counts, I'm hoping for a good fit. 
Burgeoning Bohus
As for the colourwork, I'm reworking that too.  After swatching the original pattern, I decided to modify (not too keen on the purls).  Using knitter's graph paper (googling will net quite a few free sites), I pulled out my pencil crayons and coloured.  And if the colours didn't "feel right", I changed things whilst knitting.  Guess the pattern is more organic than planned. But it looks awfully purty. ;) 


So far, so good.

Friday, July 15, 2011

Take a Guess

Which project did I choose?  The Bountiful Bohus of course.  'Cuz I really do need a warm-all-purpose-goes-with-everything cardi for the fall and winter.  I've got some ratty looking cardigans that need to go into the trash (don't worry; they're store-bought ones from 10 years ago so they've more than served their purpose).  And anything I made over the past 2 years is probably too big as I've recently lost weight (you'd think 20 lbs wouldn't be a big deal--and normally it would not be a problem--but in fact, those 20 lbs disappeared over the last 6 months.  In total I've lost closer to 35 lbs over the course of 2 years so that now I seriously need to go clothes shopping, especially since attempts at shrinking my clothes in the dryer haven't been too succesful).

Beginning of First Sleeve

I decided to start off with the sleeves 'cuz if the sizing isn't working out, I can easily rip it out without too much guilt.  Already I've made mods: instead of casting on 100 stitches as called for in the pattern, I'm using 80 stitches.  Thus far, the measurements have worked to my favour--at least according to the pattern schematics.
Detail of Cables on Sleeve Edging
Since my swatch told me I've got 5.5 stitches per inch (instead of the required 5 st/in), I'm gonna aim to use the medium size to give myself a sweater that should turn out to be large.  What?  There's no medium?  The smallest size is large?  Yeah, I'm gonna have to extrapolate the numbers on that one.  But that requires--ack!--math!  No worries.  According to the pattern, each subsequent increase in size went by 20 stitch increments.  So I'm hoping that a decrease in 20 stitches will give me the required size.  The key word here is HOPE.

Wish me luck--please wish me luck 'cuz I'm gonna seriously need it.  :S

Sunday, August 2, 2009

The Socks Are Done!

Yes! Those pretty pair of blue socks (remember these from here and here ) are done and done! So very pleased with myself.

As you might recall, this pattern came from an old Patons booklet. There were elements of the pattern that I liked: the longer leg length and also the larger needle size (2.75mm versus the usual 2.25mm). One thing I did NOT like was the look of the finished heel turn. It's rather triangular and narrow. I prefer something less "pointy"--like the more rounded heel turn found in the Vintage Vogue Ribbed Child's Sock (remember these found here ).

What to do? Then it hit me: why not combine the two patterns! Take the best of each while leaving out the elements I dislike. Sound easy, right? Not so much. I spent most of the morning rewriting instructions and trying to reconcile the various stitch counts as the two patterns were merged into something new (and I should add that the pattern is only for my own personal use since I'm dealing with copyrighted material). At one point I pulled out some scrap yarn and needles to re-create the heel turn just so I'd get the numbers right. Is this what designing feels like? Have I mentioned how much I dislike math? I really, really hate math (sorry to all you math minds out there. I much prefer words to numbers).

Needless to say, I now have two sock patterns that have been customized to fit my sons' feet. Now if I could just get brave enough to try a new stitch pattern, I'd be grooving. No wait--if I came into untold riches and could use the most luxurious yarns for socks, then I'd be grooving.

Knit on! :)
Related Posts with Thumbnails