Showing posts with label links. Show all posts

Saturday, April 2, 2016

MIA?

Missing mojo is sucky, but I gotta confess: even though I have been absent the last number of weeks, I got over my slump.  Yes Martha, there HAS been knitting!  And really, that's all that matters.
Pretty yarn
In fact, I finished one project and am very close to finishing another one.  And surprisingly, there are a few other small projects in the works--nothing new or special, but something that is needed (more on that later). 
In-progress beret
So the hat I was working on is one that's been in my queue for ages.  It's Wolly Wormhead's Meret (aka Mystery Beret).  It's a lovely pattern with clear instructions and tips for mods (you can find it here along with other free patterns ).  Everything about this project made me happy except for one thing: I lost a circular bamboo needle.  The cable separated from one of the needles.  Thank heavens I didn't lose any live stitches, but I was not happy.

With school just about done, I hope I can get back into regular weekly blogging.  More importantly, I wanna get back to regularly scheduled knitting--as in every night, if you please.  It's a great cure for itchy fingers. ;)

Wednesday, December 30, 2015

And Last--But Not Least . . .

And for my final gift wrap up: part of this gift was completed early one, while the rest was a last minute add-on 'cuz I had enough yarn left over.
Almost finished hat

First off, the kitty-kat hat. I started this one early on in September (remember my complaints posted here? ). It took a little longer than the bulky and worsted hats because it was DK.  Then I waited to weave in all those ends (ugh, hate that necessary part of "finishing").
In-progress "pom-pom"

I also dragged my feet on making pom-poms 'cuz my experience with the process has not been positive.  However, I did find a couple of interesting links to modified pom-poms--or acceptable alternatives (check out this link from Repeat Crafter Me on how secure your traditional pom-pom).  I chose the alternative option which was a small crochet ball using this pattern (crocheted pom-pom, a free pattern on Ravelry.com).  Well actually, my first one was a HUGE ball that was much too heavy.  I re-worked the pattern to make it smaller.  These are my mods (somewhat following the pattern, except with different stitch counts):

Round 1: chain 4, slip stitch & then work only 4 sc.  
Round 2: 2 sc in each sc (8 st)
Round 3: sc in each sc (8 st)
Round 4: sc in first stitch and then 2 sc in next stitch (12 st)
Rounds 5-7: sc in each stitch
Round 8: sc in 1st stitch, then draw loop through 2 sc to decrease (8 st)
Round 9: sc in each sc
Round 10: stuff ball with filling & then decrease by drawing loop through 2 sc (4 st)
Cut long piece & then draw yarn through last 4 sc. Pull tight & secure.
Finished hat complete with faux pom-poms

What do you think of the finished hat?  The balls actually look like pom-poms 'cuz the yarn is so fuzzy.  Bonus: my niece loves it so much, she's been wearing it non-stop (she loves hats anyways, so this gift was a no-brainer).
My niece in her hat
I wasn't sure she would like the wrist-warmers, but she loved them too.  Sadly I have NO photos of these--not even in-progress shots. 
Poor substitute for finished photo of wrist-warmers
So I'll share a lovely photo of the yarn used.  I really liked the pattern, Cleckheaton Country Silk Fingerless Gloves (which is a free download at Ravelry.com).  It's an easy-to-follow pattern and the gloves fit well (I think it's the ribbing).  For the striping, I worked a plain knit row when adding a new colour.  No real mods, but I'd recommend changing thumb placement:  I wish I had knit the first 2 stitches BEFORE binding off the 6 stitches for the thumb opening. For the second mitt, I worked the round till the last 8 stitches, bound off 6 stitches and then continued in ribbing for last 2 stitches.

Now I can get back to knitting for l'il ol' me. ;)

Saturday, December 26, 2015

About All the Knitting . . .

There is much to share!

First off, all gifts were sent off and/or dropped off in time for the holidays.  That was a bit of a challenge.  You'd think a few hats would be easy to whip up, but I got distracted by work, school and family life in general--and of course I had to re-do one set of mittens and hat (remember this post ?).  And honestly, I wish I could have made more . . .  

Of course, when you knit for someone else, you never know if the recipient will appreciate the effort or even the item, especially if the recipient is a child.  It can be hit or miss (but I needn't have worried).
First Berry Hat with matching mittens
My sister and her kids loved their hats--and everything fit which is a double bonus, especially when the recipients are so far away.  Distance can make measuring next to impossible (although I suppose I could have asked my sister to measure the kids' heads, but that would have spoiled the surprise).
Second Berry Hat with matching mittens

Remember the  Pixie Earflap Hat with matching mittens?  As you may recall, the hat was the Iceland Earflap Hat  from Crystal Palace Yarns.  I made a few mods because the original was adult-sized and written for super-bulky yarn (I was working with bulky and needed toddler size).
Modifications included:
1) bulky yarn on 6.0 mm needles
2) brim worked in garter stitch instead of ribbing so it would blend into garter flaps
3) stitch count adjusted to accommodate toddler size:  when connecting flaps & joining in round, knit across 1st flap (15 st), cast on 9 st (instead of 12), knit across 2nd flap (15 st) and then cast on 15 stitches (instead of 18)--54 stitches total.
4) second hat had no I-cord ties, but was otherwise constructed in the same way

Last Minute Mittens
The mittens were an amalgam of two patterns:  mostly used Last Minute Mittens  from Valley Yarns, but used measurements from  Bernat's Family Mittens to help achieve appropriate size (and it helped to be working with toddlers who willingly tried on the mitts as I worked on them).

Modifications included:

1) used 5.0 mm needles instead of 6.5 mm
2) using women's size small, worked cuff in K2P1 for 1 1/2" (instead of 2").  Then worked 1 plain row in knit before working thumb gusset as written
3) after round 9 of thumb gusset,, worked 1 plain knit round before putting aside 6 thumb stitches on holder
4) worked body as written, but only until length was 5" (instead of 6-7").  Decreases worked as written
5) For thumb only worked 5 rows on 9 st (approx 1") before decreasing/casting off


I'm so pleased with the final results that I'd like to make more mittens.  Hard to find toddler-sized mittens that fit easily and stay on.  I tested these on toddlers in my classroom, so the pattern works.  I think I'll start by finishing the rust mitts I couldn't use for my niece.


More to come later  . . .

Wednesday, December 26, 2012

For the Love of Barbie

Oh yeah!  Deep down, I'm a kid at heart.  And this kid loves her new Barbie (FYI: she's Fashionista Therese).  I've been wanting one for a long, long time and my family finally gifted me one for Christmas. :)
One Happy Kid ;)
Therese out of the Box

And with a Barbie doll comes the responsibility of dressing her in the most smashing outfits.  Have you seen some of the doll clothes in the toy aisle?   I have two complaints: 

  • A) The official Mattel Barbie outfits can be pricey
  • B) Those very same outfits may not be pretty or stylish, especially the cheaper ones (the expensive ones tend to be pretty, but pricey--see A above).

What's a crafter to do?  Make her own Barbie clothes of course!  I dug out an old Patons Beehive doll book (the original I lost many moons ago, but I found a copy a few years ago for 25 cents).  I actually made some those outfits when I was a kid.
Patons Beehive Book No. 139
I also found a site with vintage Barbie patterns (not sure who the original publisher was, but the patterns can be accessed off the website for free OR downloaded for a fee in a digitally enhanced e-book).

And if someone is handy with a sewing machine, they should check out the Craftiness Is Not Optional blog (scroll down to the end of her tutorial page to find the Barbie stuff).  She's got picture tutorials for a ball gown, skirts and tees to fit Barbie and friends.

Of course a search on Ravelry proved rather fruitful too.  There are a few crochet and knit patterns.  In particular, I found a great site with hundreds upon hundreds of Barbie patterns--all for free!  And some of the designs are just cute.  Check out Sticka till Barbie where the site owner/designer has patterns in many languages, most of which use fingering weight (good way to use of leftover sock yarn).

Right now I'm attempting a little top with cap sleeves.  I should be done by this afternoon--I hope.
Burgundy Top in Progress
Meanwhile, my Barbie patiently poses while awaiting her new outfits (it's hard work being stylish).  ;)
Striking a Pose
Hope you're enjoying the after-glow of good holiday spirits. :)

Saturday, January 7, 2012

Sometimes . . .

Big Slipper and Little Slipper
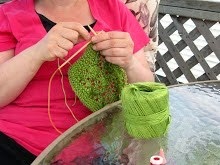
When I get the urge, I'll start a small project.  The thing might languish in my basket for a while.  But sometimes, the thing gets finished before I know it.  Go figure?!
New Slippers for my Son
Remember those lovely warm slippers I made before the holidays?  Well I tweaked the numbers in the pattern and made a pair for my son.  His old pair were wearing a wee bit thin in the sole (there was a small hole forming too, no doubt made by a loose nail in the old wood floors).

You can find the pattern for Non-felted Slippers on Ravelry (its a PDF file).  The version there is for an adult woman.  If you're interested in the child size, print off the original pattern and then make the following changes:

Cast on 40 sts and work the increases as indicated in original pattern with the marker placed in the middle.  Stop increases at row 11 (60 sts) and then work instep at follows:
Row 2: P27 PM P6 PM P27
Follow the original pattern to work the decreases and shaping.  I went down to 30 sts before working the cuff. I also added two extra rounds to the cuff before binding off.

Feel free to PM on Ravelry if you'd like more extensive row-by-row notes.

Happy knitting! :)

Sunday, December 18, 2011

How Goes the Knittin'?

What a relief to NOT be workin' on a deadline!  No knitterly gifts this year, and the only crafty one was the family scrapbook (which my parents loved!).  We've cut back too.  No gifts for the adults, except for a little Secret Santa exchange amongst the immediate family.  And we've tried to cut back with the kids too.  After all, Christmas shouldn't be about the presents; being together and celebrating our blessings should be first and foremost. 'Nuff said.
One Finished Mitten 
As for the knittin', it goes well--and incidentally remains relaxing (funny how the absence of deadlines can prove to be stress-free.  Go figure).  My son's mittens are almost done.  I've just got to work a thumb.
Second Mitten Needing Thumb
Since the project is almost done, I cast-on for something else: another sock!  This year has been the Year of the Sock--seriously.  But I do love the warmth and coziness of handmade socks.  Just perfect for a chilly day.


I just love the simplicity and ease of Liat Gat's Beginner Toe-Up Socks.  The pattern calls for plain stockinette stitch, but I always make mine in ribbing (1x3 or 2x4) 'cuz the rib seems to tighten my loose knittin'. Initially I had to sign up for the newsletter to access the pattern, but I found the PDF pattern available for free on Liat Gat's website (the worsted version) and here (fingering-weight version). 


Happy crafting! :) 

Sunday, December 11, 2011

Sharing

You gotta check out this new blog.  Its soooo cute (granted I'm a little biased).  Its called Mushrooms and Octopi and its run by two cute little fellas who call themselves Two Fun Guys.  Perhaps you've met them before . . . 
Two Fun Guys out in the woods
Now its a new blog, so there aren't too many posts.  But I'm looking forward to their updates.  Should be fun.   ;)

Saturday, December 3, 2011

Pure Genius!

Slipper Before Being Seamed
No word of a lie!  This slipper pattern is absolutely sublime :D  Its the Non-Felted Slipper (and the pattern is only available on Ravelry as a PDF file).  I just love the construction!  Hard to believe that a few well placed decreases can change the shape of the fabric--just genius!
Slipper From Another View
And since the pattern uses bulky yarn, it works very quickly.  It took me a week of sporadic knitting, but these could easily have been completed in a weekend.  This quick knit would make an easy Christmas present.  I can testify to their warmth factor (I'm wearing them right now, but you'll have to wait for FO pics on another day 'cuz its dark out now).


Later,
:)

Sunday, November 13, 2011

FO

Yup, got something finished (its been a while, n'est pas?).
Finished Slippers
Finally completed a pair of slippers for my dear hubby.  Hard to believe, but these were started a year ago . . . a whole year?!  That is way too long for a pair of slippers.  
New Slippers
I think hubby appreciated the effort (he's generally very appreciative).  I only wish he'd ask me for more hand knits (still planning to make him a cardigan one of these days.  I has the yarn and the pattern.  Now if I could only find enough time during the run of a day.  Or perhaps I could become a faster knitter . . . ha, as if that is ever gonna happen).


It always bothers me that my slippers never quite look like the traditional Phentex slippers.  I never got the hang of the striped version--can't seem to avoid the holes.  So I alternate colours every two rows.  My finishing is also less than acceptable.  Thankfully I found a blogger who's made a lovely tutorial over at Pinney and Pnut.  She clearly illustrates how to assemble the slippers.  Check it out.


Now I'm off to enjoy one more day off.  Have a good one. :)

Friday, July 16, 2010

Healthy Hands

Holding Hands
(courtesy of morguefile.com)

Or not!  Over the past few years, arthritis has crept into my joints--not too bad, but it is an annoyance.  Thankfully knitting and crocheting keep my digits limber.  Unfortunately I hurt my hand a few days ago.  While trying to open a stuck window (curse the rain and humidity), I strained the muscles in my left hand.   Consequently, the crafting has diminished.  Last night, I tried knitting and that wasn't too bad (thankfully I throw with my right hand).  The crocheting I had to limit 'cuz I use my left hand a lot more.

Through blogs and forums, I've often come across posts by crafters re: pain in their hands (usually its about carpal tunnel syndrome). The incident got me thinking about how to avoid strain and pain in my most precious crafting tools: my hands.  Taking lots of breaks is advice I see a lot, but I don't knit or crochet for hours at a time either. 
Thumbs Up
(courtesy of morguefile.com)

Recently Interweave Knits' Daily Newsletter posted a few suggestions re: hand exercises.  I did try them out since they were easy to do.  If you think about it, your hands do have to stay limber and relaxed to work well.  I'd also add stretches for arms, neck and shoulders.  Sometimes being in the same position can cause muscle stiffening--at least for me.

On the Ravelry forums, a knitter suggested a visit to the Knitting Guru (love the name and the big Buddha too).  The guru offers various exercises for knitters so they can avoid pain and discomfort.  Good tips I think.
Happy Hand
(courtesy of morguefile.com)

Recently, I've seen a plethora of special gloves designed specifically to alleviate the pains and strains suffered by crafters.  About a month, Berroco yarns had a contest for the Handeze glove.  And Mary Maxim had a pair of crafter's gloves in their online and paper catalogues.  Guess they are becoming popular.  Wonder if they work?

Just wonderin': how do you do to keep your hands healthy?

Monday, March 8, 2010

Almost Forgot . . .

photograph from photonet.com

Just a quick drop-in to share the big project I had been working on for Bernat blog.  It's my bestest and fastest knit to date (I know bestest isn't a real word, but I claim writer's creative license).

Hope there's some sunshine in your week.
Happy crafting :)

Monday, February 1, 2010

Where's Me Hook?

I am so psyched to start a crochet project.  Nothing too difficult or too big--just a small, manageable project suitable for a "beginner".  And its not just 'cuz I found my doily from way back when. 

I read many, many blogs (perhaps too many--100 at last count--which reminds me that I gotta update my blogroll soon).  Many are knitters, but some of them also crochet.  Their collective creativity has got me inspired:  
I'm not ready to work on something so ambitious as a cardigan, but surely there must be something out there for me to try (and I am scouring the free pattern libraries).  Meanwhile, I'm perusing some instruction books I picked up over a year ago from Crafter's Choice Book Club .  

Me thinks me needs to find me hook!

Sunday, September 20, 2009

Baby Sophisticate FO


Well its sort of an FO--and a darn cute one!  The ends need to be darned in; the holes under the arms need to be sewn up; buttons will need to be found and attached. Yet I can't help but feel proud of myself.  Pardon my vanity, but I did a great job and in record time too!


The shawl-like collar construction piqued my interest as I had not made anything like that before.  The button bands and collar are worked at the same time.  With all the slipped edge stitches, it was very easy to pick up the band and collar stitches.  I ended up with exactly 100 stitches.  Go figure?  The collar required some short-row shaping.  It was a perfect opportunity for me to practise my technique.  I've said it before and I'll say it again: I love, love KnittingHelp.com for their instructive videos.  I referred to their short-row instructional video so that I wouldn't mess up (I always forget how to pick up the wraps). 


I also tried a different bind-off technique.  The designer recommended using EZ's sewn off bind off.  Thankfully the designer also left a link to Knitty.com which described the process with clear and concise step-by-step instructions.  It took me a little longer to bind off one hundred stitches, but it was well worth the effort.  I think the edge looks very clean and much neater than a regular bind-off.  Try it out for yourself on a swatch to see the difference.  I may have to try it on my lace projects when I'm ready to bind off.
Related Posts with Thumbnails