Faux-Thrum Mitten
designed by DinaPurls (aka Acrylic-Girl)

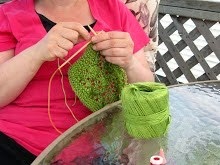
Although not strictly a "thrum mitten", this pattern combines worsted wool and roving to produce a thick, cushiony fabric--great for keeping hands toasty on a frigid winter's day.
(Fair warning: pattern has not been tested. Please leave comment below if you find an error or contact me through my Ravelry profile page. Every effort has been made to ensure the pattern below is accurate. Updated Dec 2011).Supplies:
- 1 skein worsted weight yarn (I used Briggs and Little Tuffy in ecru)
- 1 skein super-bulky roving (I used Bernat Roving, although Patons Roving or Briggs and Little Roving could be suitable substitutes)
- size 4mm DPNs (or size needed to obtain gauge)
- size 5mm DPNs (or size needed to obtain gauge)
- tapestry needle
- stitch markers
- stitch holder (or scrap yarn)
K=knit
P=purl
st(s)=stitch(es)
P=purl
st(s)=stitch(es)
MC=main colour (worsted)
CC=contrast colour (roving)
PM=place marker
M1=make one stitch
K2tog=knit two together
KFB=knit in front and back of stitch
CC=contrast colour (roving)
PM=place marker
M1=make one stitch
K2tog=knit two together
KFB=knit in front and back of stitch
Diagonal Pattern: This pattern uses a four-stitch repeat that moves over to the right by one stitch every round.
Round 1: With MC K3; then using CC K1. Repeat to end of round.Round 2: With MC K2; with CC K1; with MC K1. Repeat to end of round.
Round 3: With MC K1; with CC K1; with MC K2. Repeat to end of round.
Round 4: With CC K1; with MC K3. Repeat to end of round.
(chart photo pending)
Size: child (medium adult)
Size can easily be adjusted by adding or removing stitches in increments of four.Gauge: 5 sts per inch
PATTERN
Cuff:
- Using MC and 4mm DPNs, cast on 28 (36) stitches using the long-tail cast-on
- Being careful not to twist stitches, join in the round. PM to indicate beginning of round.
- *K2P2; repeat from * to end of round
- Working in the round, repeat above ribbing for 2.5 (3) inches
- On last round, increase 4 sts evenly across (32, 40 sts). I used KFB.
Establishing Diagonal Pattern:
- Switch to 5mm DPNs
- Using MC, knit in stocking stitch to end of round
- Next round: using both MC and CC, begin working diagonal pattern to end of round.
- Continue diagonal pattern for 2 more rounds
Now you will be working the thumb gusset while still maintaining the diagonal pattern throughout the body of the mitten. Please note that the thumb gusset is worked in a checkerboard pattern, alternating each stitch between worsted and roving.

Gusset Set-Up:
- PLEASE NOTE: Any purl and M1 stitches should be worked using worsted yarn regardless of where it falls in the checkerboard pattern. Work new stitches into pattern on following round
- K1, PM, P1, M1, K2, M1, P1, PM . Continue rest of round in established diagonal pattern (34 sts, 42 sts)
- Next two rounds, knit even in checkerboard pattern across gusset (between the purl stitches) and in diagonal pattern in body of mitten
- Continue to increase every third round within gusset until there are 10 sts (12 sts) between the purl stitches (40sts, 50 sts)
- Work two more rounds even in established patterns
Thumb Opening:
- Next round: K1, remove marker, work across the thumb gusset until 1 st before marker (that is, work until second purl st)
- Slip 10 (12) stitches just worked onto stitch holder or scrap yarn. This is the thumb opening
- P1 and remove marker
- Continue diagonal pattern established to end of round
Body of Mitten:
- Using either MC/CC as established in diagonal pattern:K1, PM (to indicate start of round), K1, cast-on 2 sts over thumb opening (use MC), K1. Work to end of round while maintaining diagonal pattern (32 sts, 40 sts)
- Continue working till body of mitten measures 5.0" (6.5" ) from ribbing.


While still maintaining diagonal pattern, work decreases as follows:
- With MC K1 K2tog over worsted stitches; with CC K1. Continue to the end of round (24 sts, 28 sts). This reduces the diagonal pattern from a 4-stitch repeat to a 3-stitch repeat
- Next round knit even while maintaining the new 3-stitch diagonal, staggering the roving stitch over to the right.
- With CC K2tog all worsted stitches; with MC K1 all roving stitches. This should continue the staggering of the roving, but now the diagonal pattern will be reduced to a checkerboard (16 sts, 18 sts)
- Next round knit even, alternating stitches between MC and CC to create a checkerboard pattern
- Next round drop roving and break yarn. Using only MC K2tog to end of round (8 sts,10sts)
- Next round K2tog using MC to end of round (4 sts, 5 sts)
- Break yarn and thread through remaining stitches. Pull tightly and secure end.
- Using MC pick up and knit 2 stitches from cast-on edge around thumb opening. Feel free to pick up an extra stitch or two and then decrease on next round. This helps to avoid holes
- Transfer 10 (12) stitches from holder onto needles
- Using MC and CC, knit thumb using checkerboard pattern, alternating between MC and CC (12 sts, 14 sts)
- Continue knitting even until thumb measures 1.5" from pick-up
- Maintaining checkerboard pattern, K1 with CC, K2tog with MC. Continue to end of round
- Next round, drop CC and break off. With only MC K2tog to end of round
- Break yarn and thread through remaining stitches. Pull tightly and secure end
- Weave in all the ends
- Block as desired