Sunday, May 25, 2014

So Sad . . .

Stolen from online, but I've seen this particular photo everywhere
 The hard drive on my laptop was dying a slow death.  That would explain why some much needed programs had stopped working (Virus Protection and Word).  Perhaps that explains why I couldn't download new programs, run scans--heck, I couldn't download anything!!  So poor thing is in the shop getting repaired . . . Despite cost repairs, it is still cheaper than buying a new one.
So for now, I share my sad face and hope I can reload everything back on (thank heavens I back-up almost all of my files and photos).  Hope to be "up and running" next weekend . . . 

Have a good week! ;)

Monday, May 19, 2014

Circles into Squares

Yup, that's what I do every time I make a new square.  It starts out as a circle and magically transforms into a square.  Since there's no specific pattern, (its a mish-mash of other patterns), I thought I'd post a lovely photo tutorial with the pattern so you could witness the transformation and maybe make a few for yourself.

Round 1: Using white yarn and 5.5 mm hook, chain 4. 
Slip stitch into first chain.  You've made a wee circle.  
Chain 3 (this will count as the first dc).  
Work 11 dc into the wee circle.  
Slip stitch to top of first chain (12 dc total including the 1st 3-ch). 

Round 2: Chain 3 (this will count as 1st dc).  
In same space where you slip-stitched, make 1 dc.  Make 2 dc in next dc from previous round.  
Continue working 2 dc in each dc from previous round until end (24 dc including the 1st 3-ch at start of round).

Slip stitch to top of 1st chain to end round.  Secure end.  Break yarn.

Round 3: Attach second colour to any spot between dc pairs.  Chain 3 (this will count as 1st dc).
In same space, work 2 dc and ch 1.  
**In-between next 2-dc space, work 3 dc and then ch 1.  Continue from ** until end of round.  
Slip stitch to top of 1st 3-chain to finish round (12 sets of 3 dc separated by 1-ch space).  Continue slip stitching through top of next 2 dc and into ch-1 space.


Round 4: Chain 3 (this will count as 1st dc) in ch-1 space.  
Work 2 dc in same space and then ch 1. 
**In next ch-1 space, work 3 dc, ch 2, 3 dc, ch 1 (this will make a corner).  In the next 2 ch-1 spaces, work 3 dc and ch 1.  
Continue from ** till there are four corners in your "circle".  

There should only be 1 ch-1 space left where you work 3 dc and ch 1.  Slip stitch to top of 1st 3-chain to finish the round.  Your circle is now a square! Continue slip stitching through top of next 2 dc and into ch-1 space.

Round 5: Chain 3 (this will count as 1st dc) in ch-1 space.  Work 2 dc in same space and then ch 1.  In next ch-1 space, work 3 dc, ch 1.  In corner work 3 dc, ch 2, 3 dc, ch 1. 
Continue working the granny square as already established, working sides with 3 dc and ch 1 and each corner with 3 dc, ch 2, 3 dc, ch 1.  At end of round, slip stitch to top of 1st 3-chain.  
Continue slip stitching through top of next 2 dc and into ch-1 space.

Round 6: Worked same way as round 5.  At end of round, slip stitch to top of 1st 3-chain. Secure end.  Break yarn.

Round 7:  Attach white yarn to any ch-1 space.  
Chain 1 and then 1 sc in same space.  Sc in each dc and 1 sc in each ch-1 space.  In each 2-ch corner, work 3 sc.  
At end of round slip stitch to top of first sc.

Round 8: Work 1 sc in each sc except for corner.  In corner work 3 sc in 2nd sc.  At end of round slip stitch to top of first sc.  Secure end.  Break yarn. 

Happy hooking! :)

Sunday, May 11, 2014

Happy Mom's Day

Hoping all the moms out there have a great day . . . 
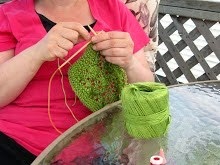
Hands courtesy of foter.com
And remembering all those mothers and children who could not be together: you are never forgotten.

Sunday, May 4, 2014

Stitching It

Bits of ends
See the bits of yarn?  Just weaving in some ends.  Not something I enjoy, but I want to "clean up" the back.
Weaving in ends
I couldn't wait for all the squares to be completed.  I needed to see the squares joined together, just to get a sense of how the colours worked together and whether the length and width would work.  
Two rows of squares joined together
Guess what?  It all works!!  I love it!  I'm already working on the next row of colours to add to the bedspread.
Related Posts with Thumbnails